Showing posts with label Virtual Home Tour. Show all posts

Wednesday, January 27, 2016

Virtual Home Tour: The Guest Room (Before & After)

It's been awhile, but it's time to continue the Virtual Home Tour. Here's a look at before and after shots of our guest room plus some text about some things. Enjoy!

THE GUEST ROOM


I love our guest room because it's actually very spacious, has a gigantic closet, and is the one room in our house that gets a lot of sunlight. Our first step when we decided to do up this room, like every room in our condo, was to paint it white:

Yay!
But we wanted to make it fun, so...

Stripes


We decided on green stripes because a) It's gender neutral (we're optimistic about starting a family and making this into a nursery one day, so...), and b) Why not? It's so fun.

And now, time for current shots of how our guest room looks like:  

Guest Bed
Here we have the guest bed that Husband built. We can't claim the idea for this. I love looking through home decor blogs and pictures - this bed was inspired from this post.
Little triangle shelf Russell built
Work Table
Work Table


Add caption
I love this window sill. It gets a lot of indirect sunlight throughout the day. We also make it our makeshift greenhouse. Most of our plants thrive when we place them here. I've taken to rotating the plants in and out of this room. But one of the recent things we've added is this little herb garden attached to the wall.


Another thing Russ made

Here's the door. Only two of our walls are painted in stripes.

Hey there
The third wall of this room consists of one giant closet. The mirrors also make this space that much bigger which is why I love this room so much.

We've christened the guest room as our creativity room. Husband will normally work in here during the day. We store our art and crafts items in here. I didn't really do a close up shot of our bar cart, but it's the blue cart from IKEA which I use to store all my sewing supplies. The yellow chest in this room (also from IKEA) is meant to be an entertainment center but we use it to display plants and artwork, and in the drawers we store canvases, paint brushes, paint, etc.

Thanks for reading! I hope you liked this installment of The Henry Home tour :)


Original post on The Henry Home.

Sunday, November 8, 2015

Virtual Home Tour: The Dining Room (Before & After)

Here's Part V of The Virtual Home Tour! Let's jump right into it.

THE DINING ROOM

Featured: Lewis' butt
The dining area is pretty small but it works well for Russ and I since we don't have kids yet. We've always figured our condo will be our starter home and hopefully as our family grows in the future, we'll be able to find another home to fit our needs. For now, it's perfect.

As you can see in the Before picture, the walls are brown. It's a good space and it was exciting brainstorming ways to fill in our little home.


We couldn't find a place for this storage cabinet. After moving it around in our condo for a bit, we found out it works best in our dining room window nook.

Not sure yet about that little green palm tree on the side. It used to be in the patio but the winds lately have hurt it a bit. It looks great in the dining area but it crowds our space. Still deciding what to do with it.


The wine cabinet has become the place where I put random, but cute, things/momentos I want to keep.
  • Snake plants: Because, plants
  • Glass jar: Russ's best friend gave this to us on our wedding. It's filled with pieces of paper--these pieces of paper are blog posts/poems from when Russ and I were dating.
  • Wine bottle: Russ's aunt made our wedding wine. For the label, she printed out stickers of our engagement pics and placed them on the bottles.
  • Mason jar with fake flowers: This was a center table piece from my brother's wedding. Angela (his wife) made these and I wanted to take home a piece from their wedding, hehe.
  • Jar with wine corks: Since we've been married, when we open a bottle of wine to celebrate small and big joys, I'll write the date and occasion on the wine cork and put it in this bottle. Sadly, this isn't all the wine corks we've collected. I have a bunch more waiting for a bottle home. Maybe it's a good thing we have all these corks? I mean, we've been married for over 2.5 years...

Made this little macrame plant holder with some jersey t-shirt material. White curtains are from IKEA. The tan curtains were hemmed and made by Russell's mom.


Okay, I don't know why I'm showing this because we haven't done anything to this light fixture. However, this is the only light fixture in our condo that I liked. It's a good little chandelier and it does it's job. But, my vision for it is to spray paint the metal areas a mustard yellow then add mustard yellow paint to the tips of the glass around the bulbs. That'll be sometime next year though.


Good ole table from IKEA. Russ and I bought this table when we first got married. The chairs were plain wood but we painted them because we like color. For the one year we were in Carlsbad, this table went into storage. We're so happy to have this table back - it's like having a brand new dining table (since we didn't have a dining area in Carlsbad).


Monday, November 2, 2015

Virtual Home Tour: The Guest Bathroom (Before & After)

Here's Part III of The Virtual Home Tour. Every time I have a visitor, the guest bathroom is one of the rooms I make them check out. It feels a bit weird forcing people to stand in the bathroom while I gush about the improvements...but I really do like this room! It's so pretty!

THE GUEST BATHROOM

Sadly, I didn't take a complete before picture of this bathroom before we fixed it up. Here's the closest I can get to the "before" shot:


In this picture, the walls are already gray. When we first moved in, the walls were a peach color. Countertops were an off-white color. And there was your standard medicine cabinet on the left. The toilet seat was also this soft pillowy cushion type thing that haunted me. After we got our condo, my mom was awesome enough to bleach everything in the bathroom. You couldn't walk in there without your eyes tearing up from all the chemicals. I was comforted by this smell because it meant clean.


We bought a tub-n-tile paint so that we could paint the bathroom countertops. I really didn't like anything in the house that was an off-white color. It just looked old, worn out, or stained. I wanted everything to look clean and fresh. After reading many DIY and renovation blogs, I found a post that talked about how you can paint your own bathroom countertops with a tub-n-tile paint. It'll save money on having to install a new countertop, plus it was fairly simple.

The process involved sanding down the counters. Luckily, we have an electric sander so this step was easy. The paint however smelled strong and bad. We had to air it out for a couple days.

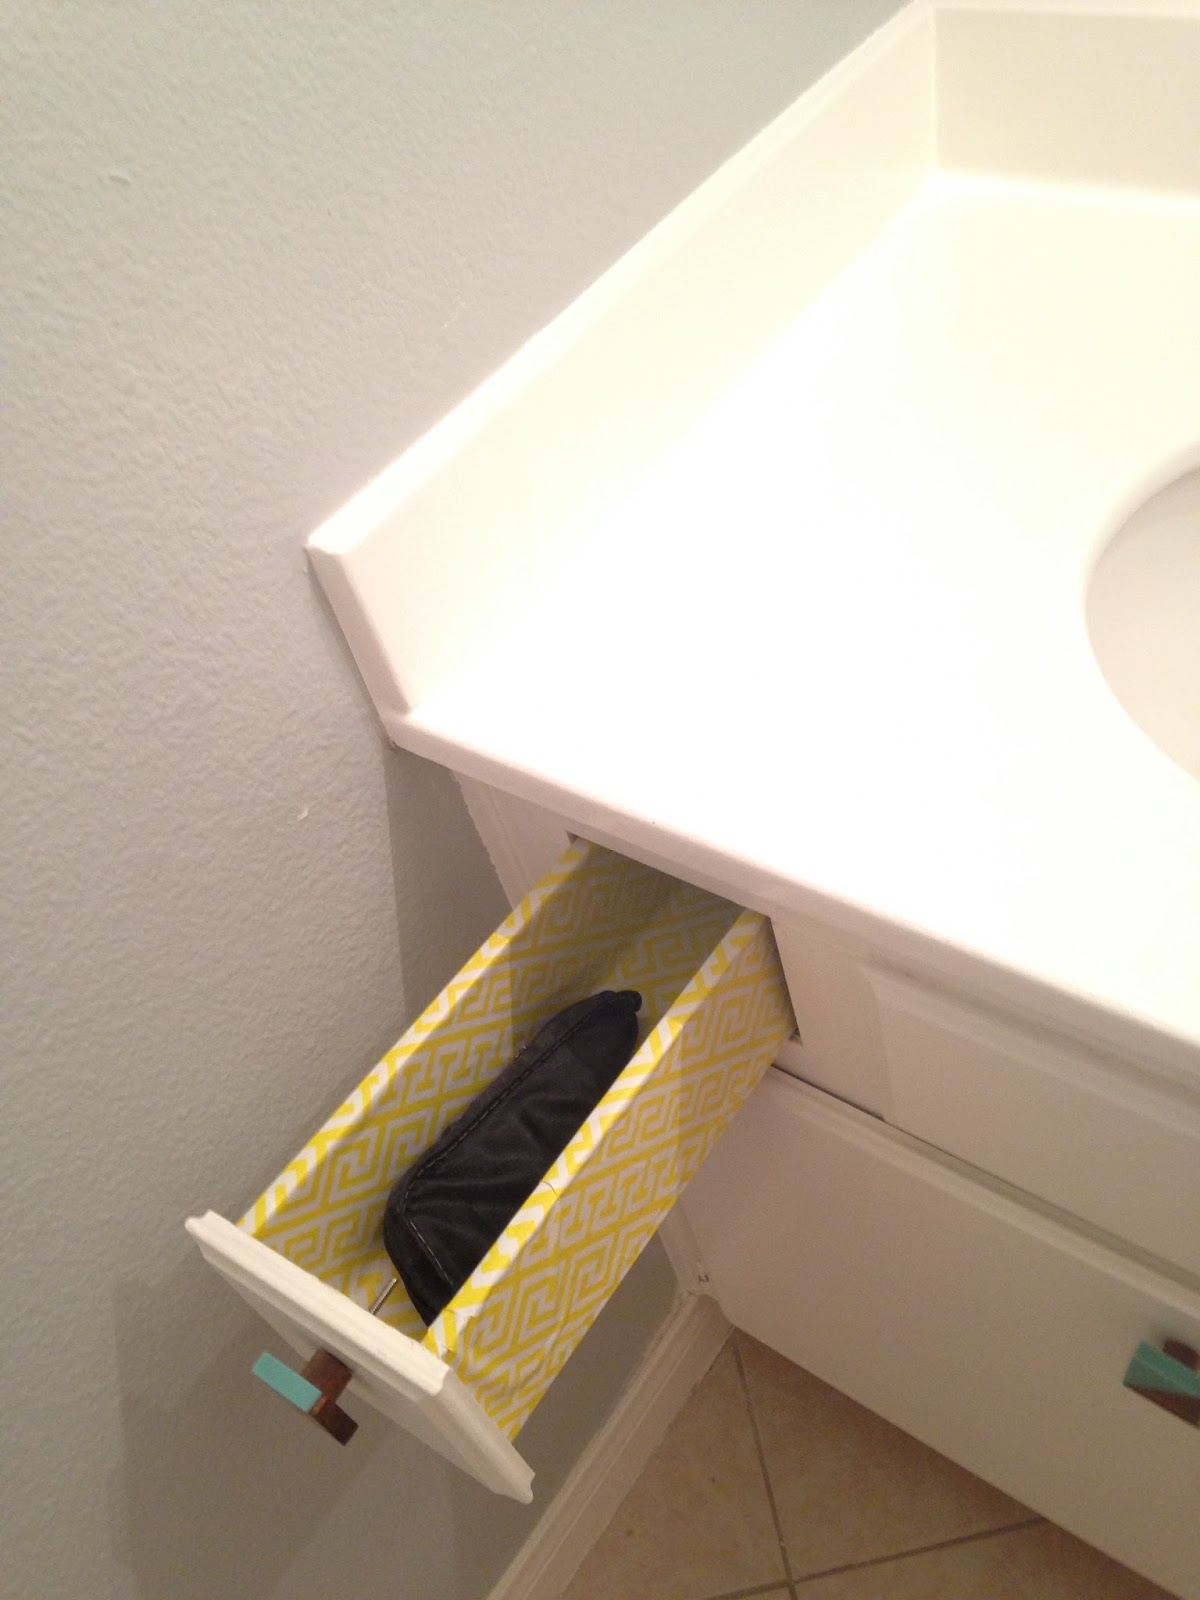
Another addition to the bathroom that you can see in this picture is that I lined the bathroom drawers in bright, happy yellow paper. I love hidden pops of color!


Check this out. The sink knobs before just looked old and out-dated. We found these modern bathroom knobs on Amazon and installed them after the sink countertop finished drying.


We installed quirky wooden knobs on the drawers and cabinet doors as well.


Both of our bathrooms have giant bathtubs and are great for baths. However, the guest bathroom had a glass door and I didn't like that guests can stare into the bathtub when they use the toilet. So we simply put up a bath rod and a curtain. This way, we can create a more half-bath feel when guests use the bathroom.


A super easy DIY project we did for the bathroom, and one that automatically makes the bathroom look nicer, is this wooden frame we put around the mirror.

The bathroom comes with a great big mirror that is in good quality, but it was just plain and boring. This project literally took Russell a couple hours at most. All we had to do was measure around the mirror, Russell cut the wood pieces, and stained and sealed them. Then we attached it to the mirror using command strips. Viola!


I also found some great ideas on Pinterest when it comes to upgrading your medicine cabinet. Since this was a guest bathroom and I knew I wouldn't be storing medicine and toiletries in this medicine cabinet, we opted to take it out and modernize the space.

Russell was able to unscrew and yank out the cabinet. He then measured the space and customized a wooden open medicine cabinet! It is more like a sunken shelf and we love it so much. He stained the wood to match the frame and it just looks so pretty. After he made the wooden shelf, I went in and decorated it.

Here are some final shots of the bathroom at its current state:
Little whale tail for bathroom hook
Incase you cared about our rugs


Saturday, October 31, 2015

Virtual Home Tour: The Kitchen (Before & After)

I've been lagging on these posts, but it's time to get it done. I'll do a series of posts that show the before and after pictures of certain rooms in the Henry Home Condo. I've slacked off on virtual house tours on this blog since we've already had a house warming party and many of you have already seen it first hand. But for the sake of me wanting to look back on this in the future, and for the sake of being consistent, here's Part II of the Virtual Home Tour.

THE KITCHEN

Here's a picture I took of our kitchen on the day we got our keys.


The kitchen was simple and basic when we got the condo. Everything worked. Actually, we haven't changed too much on it appliance-wise. There's still a lot we plan to do with it but that won't probably be until later next year. But! I don't want to undermine all the work we did on the kitchen. I think this room took the longest to spiff up.

We began the kitchen journey by painting the walls white. There's not much wall to see but it was previously a peach color (see first picture).

Then, we bought a fridge. This was a tiring search. The fridge also broke down three times in the first month we got it. Lots of our food went bad and there was a lot of eating out, but eventually the third time was the charm and the repairman fixed the refrigerator. Thank goodness for warranties!


The previous owner screwed in a paper towel holder into the cabinet itself. I was unable to unscrew it, and it took the effort of both my dad and Russell to unscrew the white paper towel holder from the wooden cabinets. The previous owners had used gigantic and super long screws to attach the towel holder. It was little things like this that made the kitchen frustrating.


We then added this cute little caddy holder we bought from IKEA (IKEA ftw!).

Also note our non-cabinet-attached paper towel holder.


While the inside of the cabinets were white (because I insisted we painted them), I wanted to give it a bit of a pop. I knew I would be spending a lot of time in the kitchen, so I wanted to be able to open a cabinet and feel happy instead of bored about dishes. So, I lined the back of my cabinets with colorful gift wrap! (See below picture)


Stripes & polka dots!
This was a process of measuring, cutting, and taping the wrapping paper to the back of the cabinets. It didn't help that on the day that I did this, it was very humid and the double-stick tape wouldn't hold as well. However, the end result made me happy. I also added liners to the bottom. They're not pictured here but you'll be able to see them in the final end result photos.


Then came the part I had been anticipating. Since way before house searching, I had always fantasized about having a white kitchen. We didn't have the money to reinstall completely new cabinets so we decided to just paint them. We waited to paint the kitchen cabinets until we were all done painting our entire condo (seriously, we painted every wall of our condo).

Russell unscrewed all the cabinets and sanded down the wood surfaces. We did it in two parts: the upper cabinets first, then later the bottom cabinets.
Kitchen in progress photo
While the top cabinets dried, we laid out a mat in the guest room where I painted the cabinet doors during the day.

This was a painstakingly slow task. Mostly because I didn't realize how many layers it took to get the cabinet doors painted. Not only that, but sometimes we would have to re-sand in between painting the layers to get the paint even on all sides. Even thinking back to this task has made me exhausted. It took forever.


But you guys, once we finished painting all the cabinets and put the doors back up, it was beautiful. We bought simple black knobs from IKEA. I noticed that since the last owners didn't have knobs, there was a lot of wear-and-tear as well as grime around the places their hands touched most. I didn't want to take the chance on making our clean, newly painted cabinets dirty so we installed knobs. Plus, the black knobs add a touch of class.

I love how our kitchen looks like now. There's still a lot that I want done to it. For example, I have a frustrating relationship with the white countertops. I don't even know what material it is but it stains so easily and I find myself having to bleach it weekly. The sink is not stainless steel nor is it a deep sink. We also still need to change out the microwave and add a tile backsplash. However, despite all that, I am content at its current state. Also, the kitchen is such a big project that we are content taking time off from doing any renovations on it.

Without further ado, here is the current state of our kitchen!
Kitchen caddy with a plant
Refrigerator 
Fun kitchen mats
Sink
Cabinets with bottom liners and (fun) background decorations
Kitchen counter stools
Story: We bought these stools from Craigslist for $5. Russ spray-painted them white and my mom-in-law helped us reupholster them with this fun fabric.
Kitchen plant. And our clipboard key hook


This concludes The Kitchen part of the Virtual Home Tour!